



Enlist the help of a friend - The Shelves are much easier to put together with two people. You can assemble flat on the floor or standing up, whichever suits the space you have.
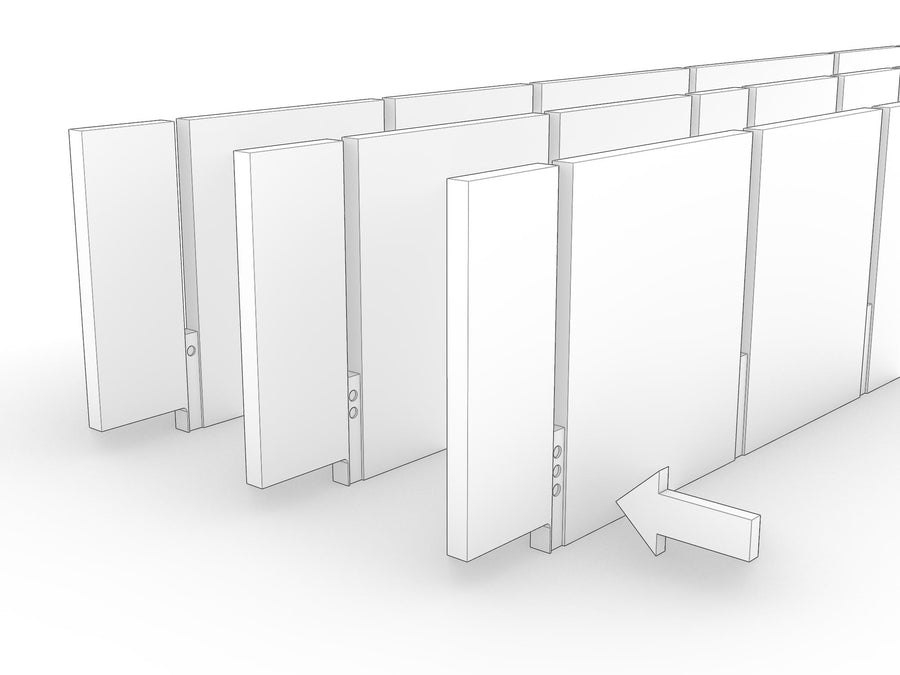
Each upright is numbered with dots in the bottom slot. Lay them out in order, evenly spaced and in the position they'll end up in.
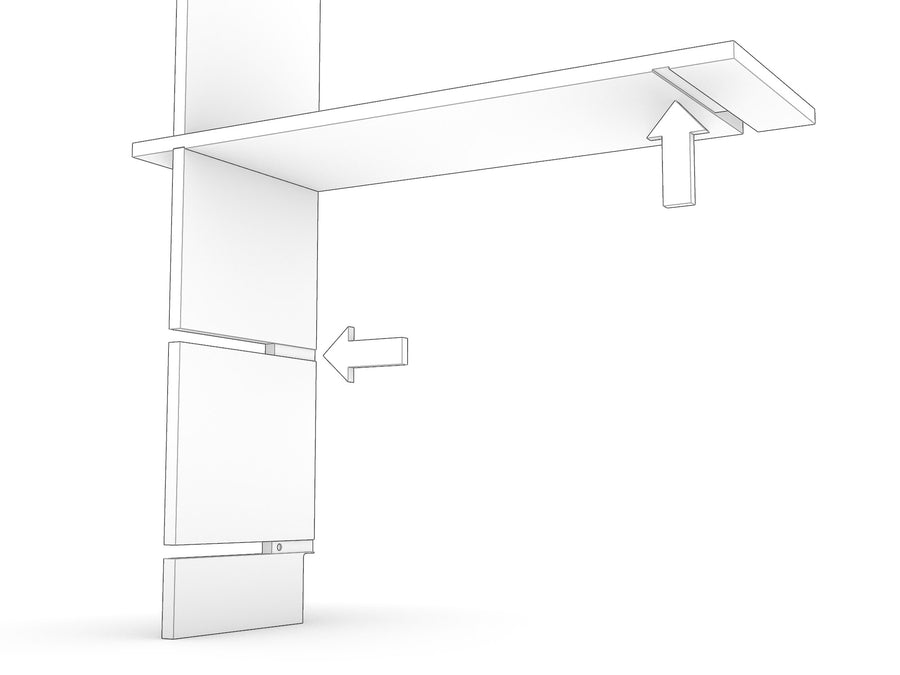
This one is critical - get it wrong and you'll be pulling the unit apart to start again. There are three things to check before anything slots together.
Check all three across every part before you start slotting things together.
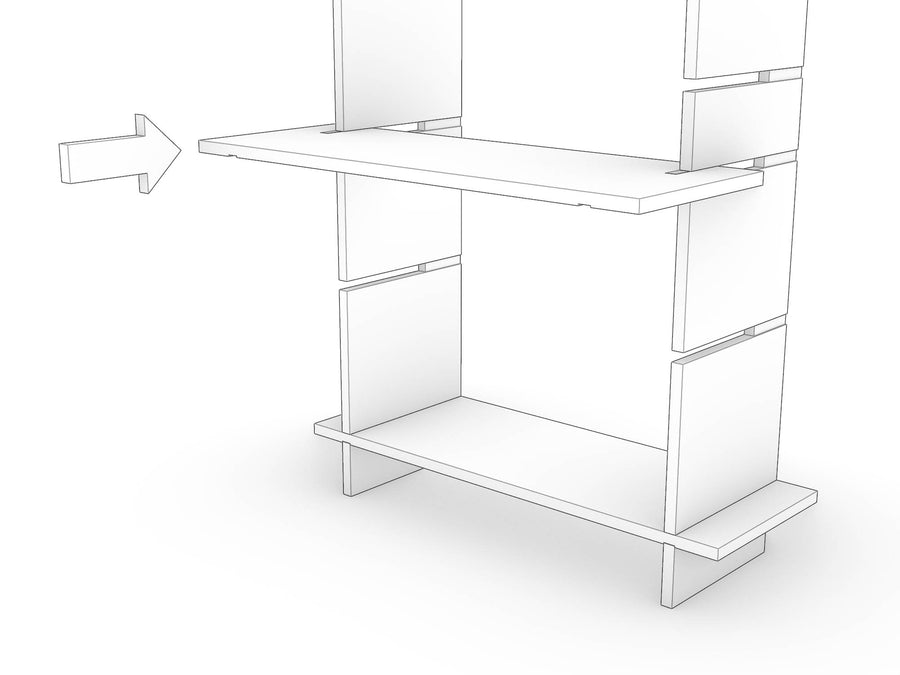
Slot some of the short shelves into position between the first two uprights, again checking the rebate orientation as you go.
One of your shelves has a laser engraved safety warning on it. Please read it before you fit it - then use it as one of the bottom shelves, down low, where you won't have to look at it every day.
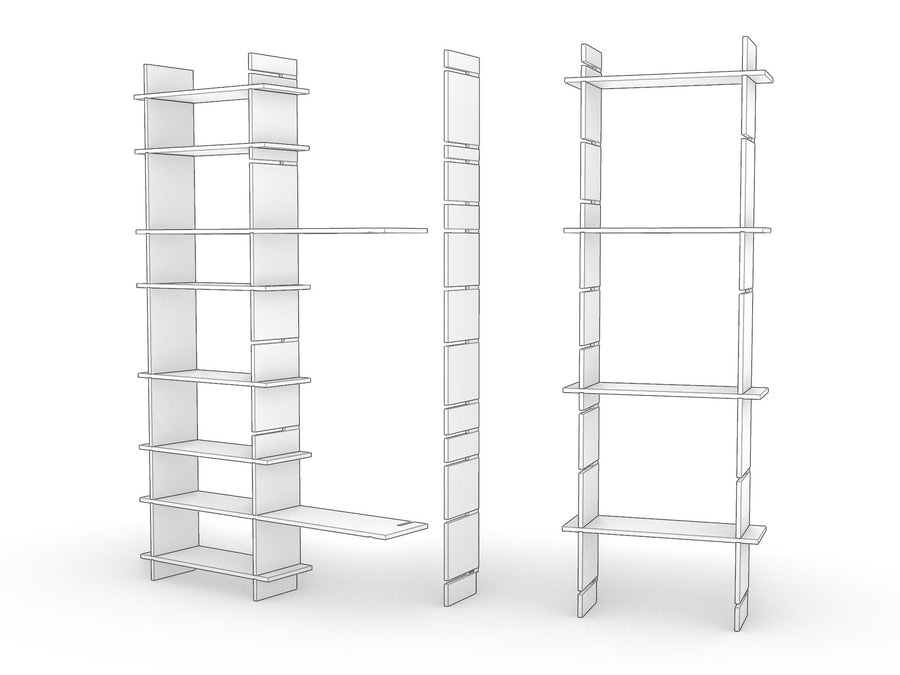
On larger sets, build the unit in sections for stability, then bridge the gaps between them with the longer shelves.
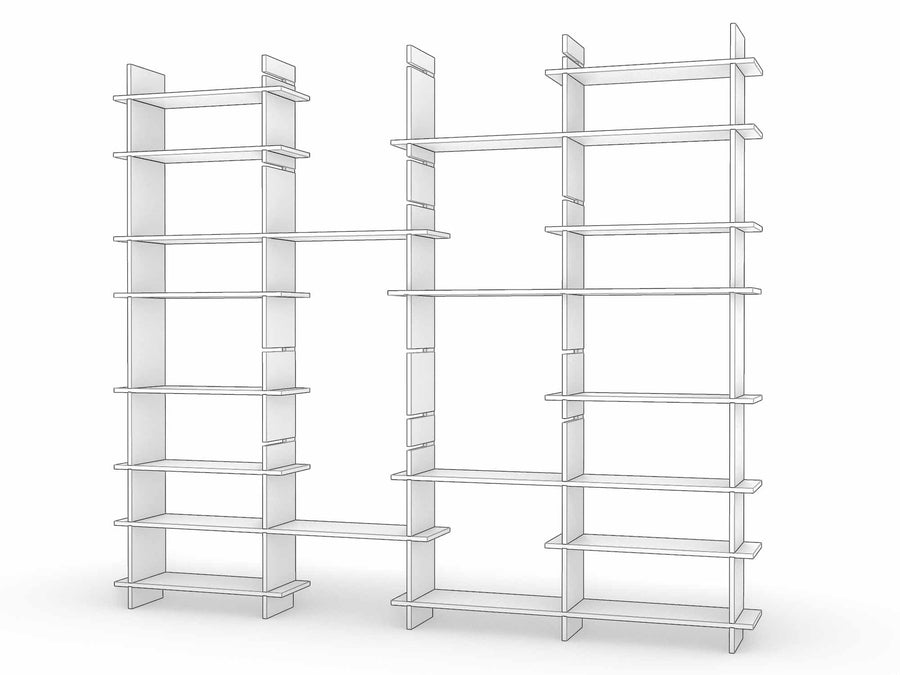
Fill in the rest of the shelves. Slow, even insertion matters more on the longer shelves - take your time and keep them square to the upright.
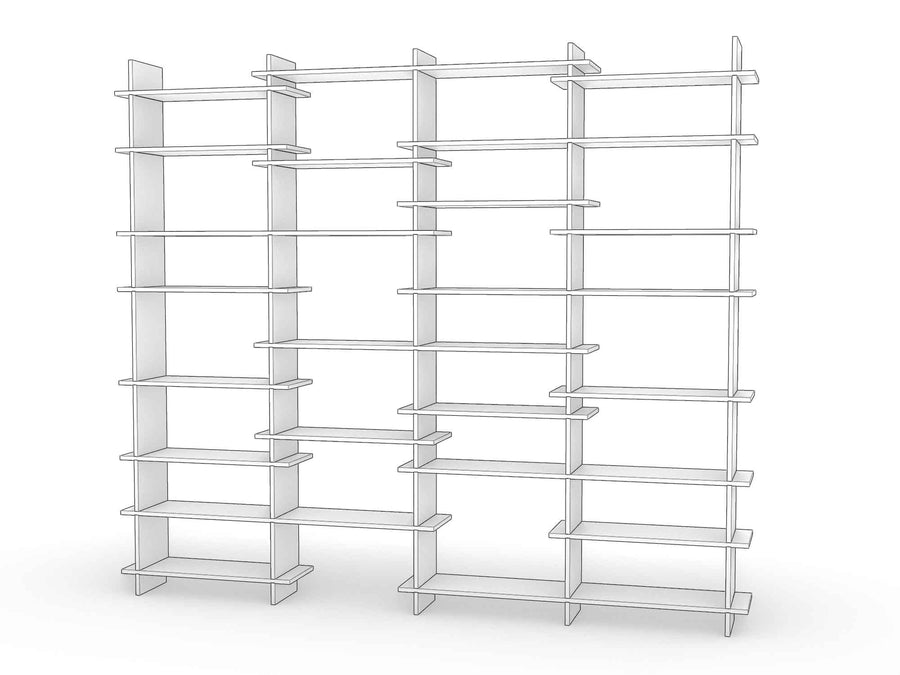
Check all shelves are positioned correctly and seated all the way back into the uprights. Protecting the edges of the ply, gently tap home any that are still sitting slightly proud.
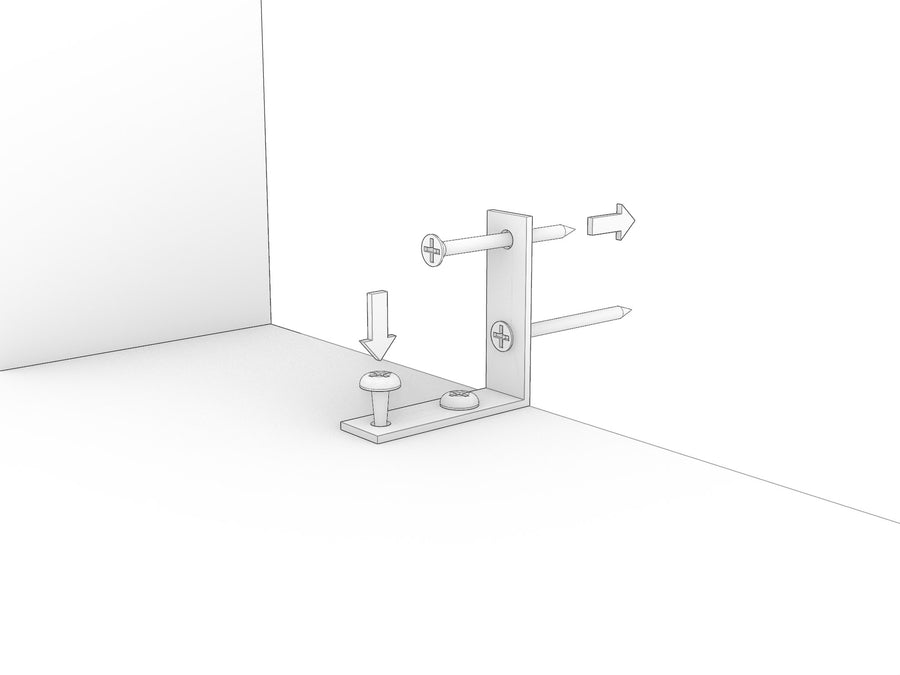
Tall furniture can tip if it's climbed on, loaded unevenly, or knocked - which is why every set of shelves must be anchored to the wall. It also stops the unit skewing or shifting over time, so it stays square and solid.
A wall mounting kit is included with every set of shelves. Use the short pan head screws into the top of a shelf up high, where you won't see them, and the longer screws back into a wall stud - a stud gives you by far the strongest fixing, so find one if you can.
If you can't find a stud, use the provided plasterboard fixings with the shorter countersunk screws.
Your shelves must be secured to the wall. We strongly recommend engaging an appropriately skilled and licensed person to carry out the wall fixing, as the right fixing depends on your wall construction.
See our maintenance and care page for tips on looking after your new shelves.
As always, we're here to help if you run into difficulty putting your product together, or caring for it.
New mandatory standards require all furniture makers to include the following information on their products. Please get in touch if you have any questions!


WARNING

Director & lead designer
Real person, not a chatbot. I read and reply to messages myself, usually same day.
Text anytime. I manage my notifications, so you won't disturb me. Message whenever suits you and I'll pick it up when I'm back online.
