



All of our crates are shipped flat-packed thanks to our spring-steel clip system that snaps into form a tough and durable assembly. Assembly is quick and straightforward - it takes about 2 minutes for a first timer to assemble by adding the clips, and you'll only get faster from there.
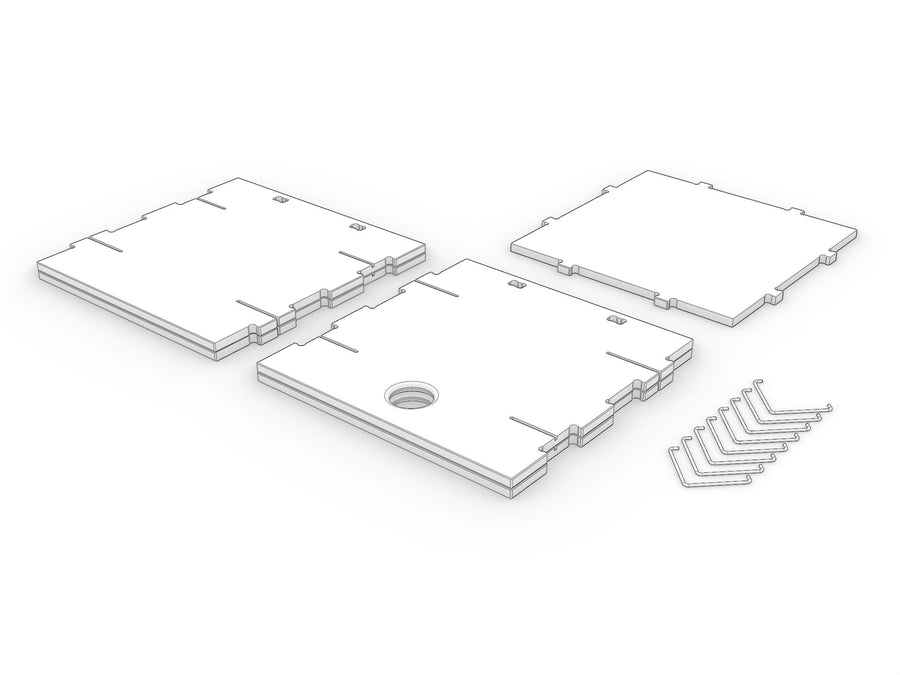
Start by sorting your parts like for like - base, sides, ends and the spring-steel clips.
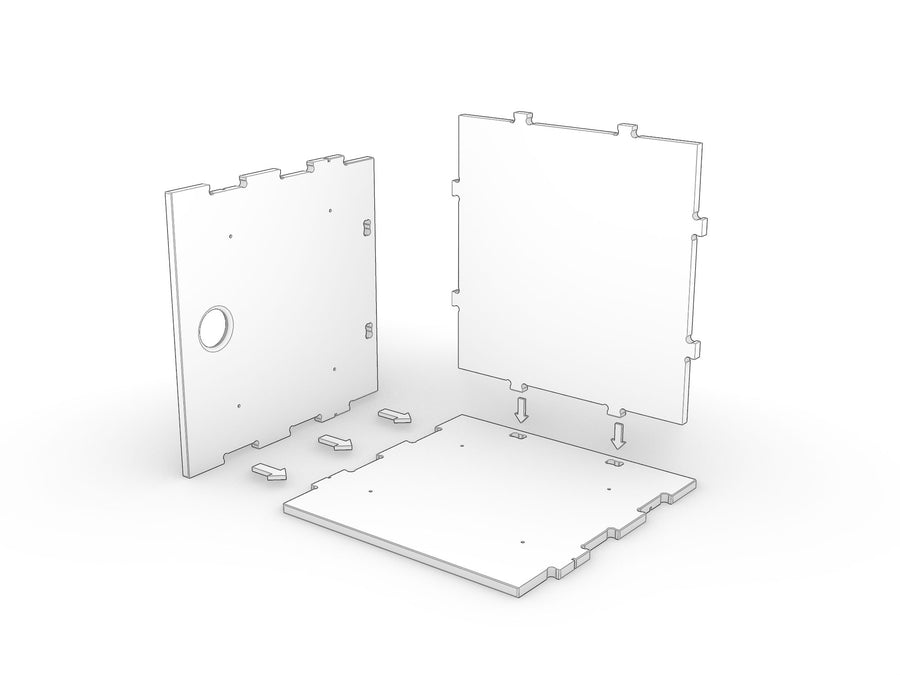
Start with one of the sides flat in front of you and bring the base down into position, notching the fingers into the holes in the side.
Once the base is joined to that first side, add the other sides around it until all four are in place around the base. Check that the clip slots all sit on the outside as you go.
Put the whole crate together like this first, before you add any clips - it's the easiest way to spot a panel that has gone in the wrong way round.
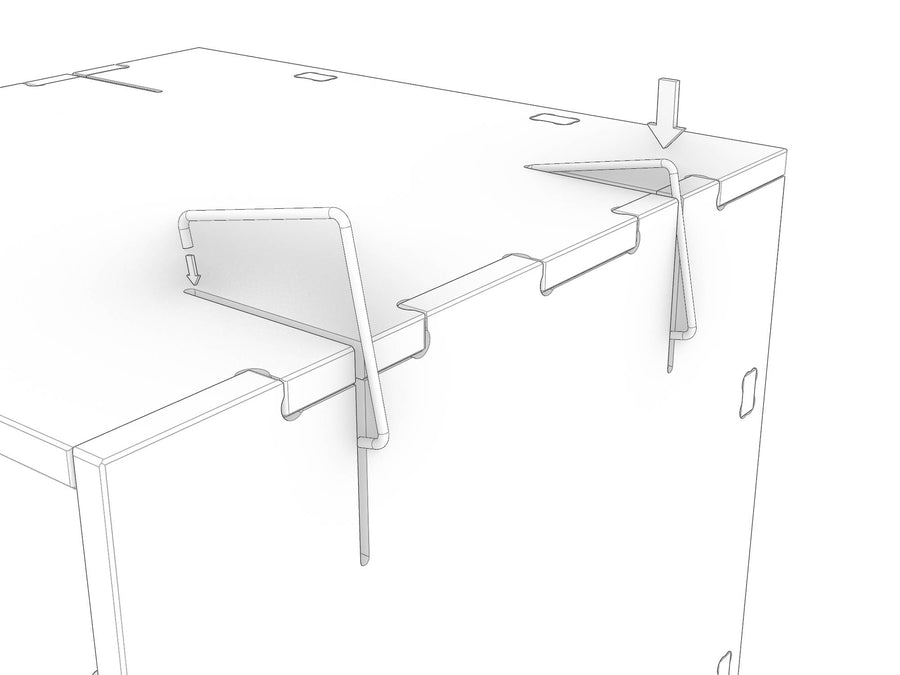
Line each clip up carefully over its slot, get the top of the clip seated in the hole, then push down until it snaps into place.
Use a blunt object you can hold comfortably in your hand - a small block of wood or the end of a wooden spoon. You can do it with your fingers, but it will hurt.
If you don't get the snap, the top of the clip wasn't fully seated before you pushed down. Jiggle it back out, line it up again and try once more - you should get that satisfying snap.
To remove a clip for disassembly, poke it out from the inside with a chopstick or similar. Take care - the clips are under spring tension and can go flying when they come out, so wear suitable eye protection.
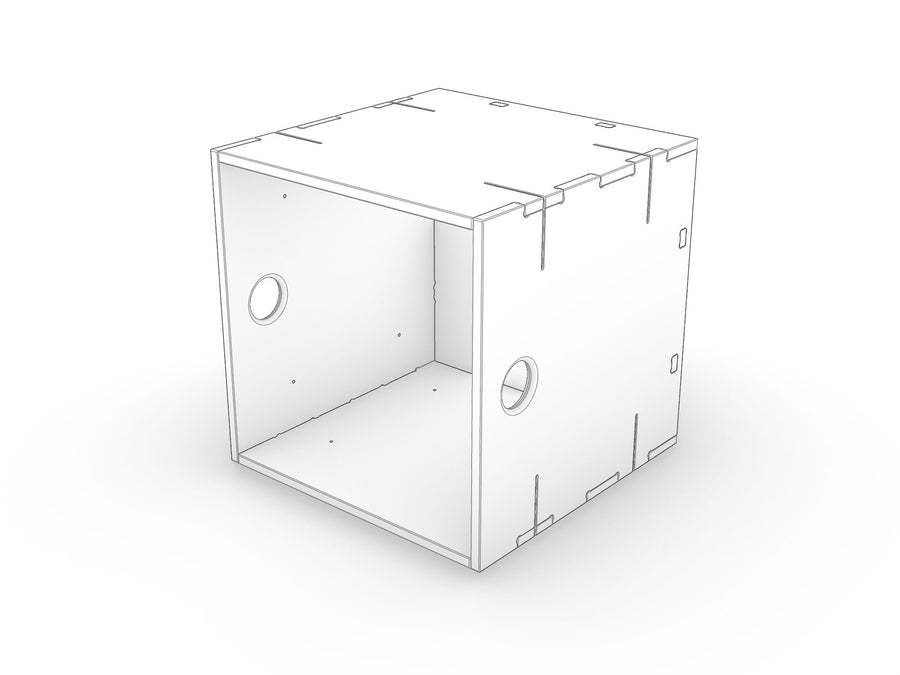
That's it - a finished crate with no glue anywhere. The flexibility in the joints is exactly what makes these crates so tough and hard-wearing.
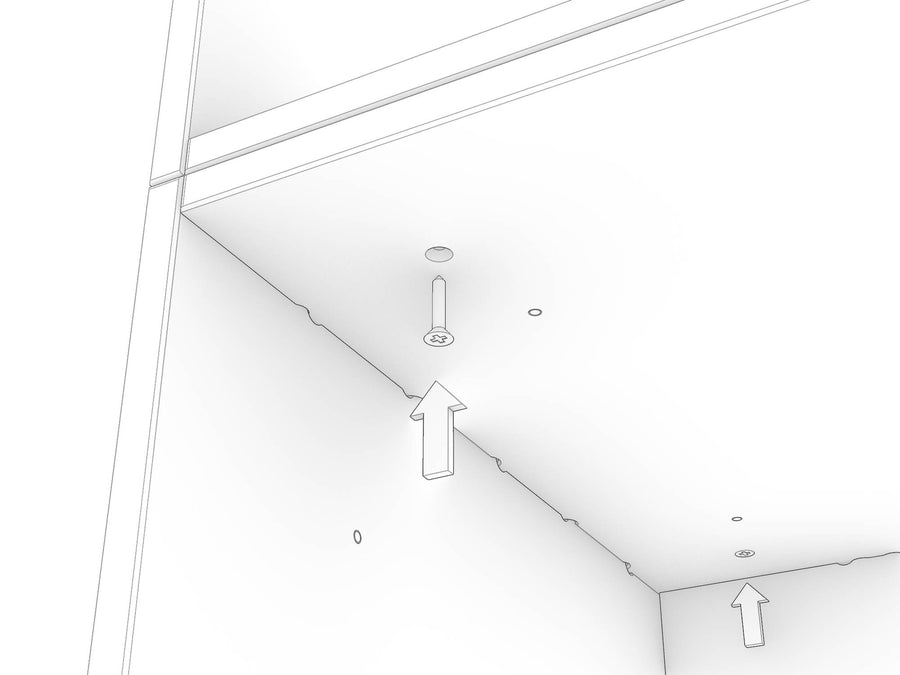
Building more than one crate into a stack or a wall? We recommend fixing them to each other with 20mm countersunk screws, driven up from the bottom of the crate below to form a stable configuration. For a wall of crates, screw sideways into the neighbouring crate as well.
If you're building a tall stack or a wall of crates, it must be secured to the wall. We strongly recommend engaging an appropriately skilled and licensed person to carry out the wall fixing, as the right fixing depends on your wall construction.
Dust bunnies are an old extra we can supply on request - offcuts at 340 x 50 x 15mm that sit under the bottom crate to lift it off the floor for a nice shadow line. They aren't included as standard, so just ask and we'll throw some in.
As always, we're here to help if you run into difficulty putting your product together, or caring for it.
New mandatory standards require all furniture makers to include the following information on their products. Please get in touch if you have any questions!


WARNING

Director & lead designer
Real person, not a chatbot. I read and reply to messages myself, usually same day.
Text anytime. I manage my notifications, so you won't disturb me. Message whenever suits you and I'll pick it up when I'm back online.